
In this article, we will present the necessary keys to know how to adjust Salomon ski bindings. Therefore, we address all those interested in this activity called skiing.
Then we will describe some simple steps that you can follow. These steps will help you know the proper way to get the best configuration and with that the best experiences, safe and efficient in skiing.
Salomon Ski Bindings We Recommends

- Last: 104 mm A relaxed, comfort-focused last designed to accommodate wider and higher...
- My Custom Fit Comfort Liner + Woolmetal A Woolmetal layer inserted in the liner guarantees...
- 3 Riveted Alumix

- The 10k/10k fabric sheds light snow and rain.
- With a regular fit and strategically placed pockets, you can carry all your essentials in...
- Keep warm as you take on new runs with 60g insulation.
How to Adjust Salomon Ski Bindings: Some previous considerations
Now, before beginning with all the keys to knowing how to adjust ski bindings din, we must mention some previous considerations to do faster and more efficient work. As a general rule, these types of tasks can be quite simple, once you have already done so. This brand of skis builds and designs a certain variety of fixings, which are different from many other similar models that are for sale in the market.
One of the differences of the marker links is that the links of this brand do not provide forward pressure with a universal adjustment. This means that depending on the union model of this brand that you own, it could change concerning forwarding pressure indicators.
Therefore, since there is too wide a spectrum of links, you must know exactly the model you have. So it is highly recommended that you know your model before starting to apply any type of adjustment.
Then those Solomon fixings that have a heel piece Z, that is the fixings that have this particular type of piece include Solomon L9, Z10, BBR, Z12. On the other hand, this type of piece can also be found in other brands such as in the Atomic FFG 10, FFG 12, FFG 14 fixings.
You may also like: What to Wear Under Ski Pants?
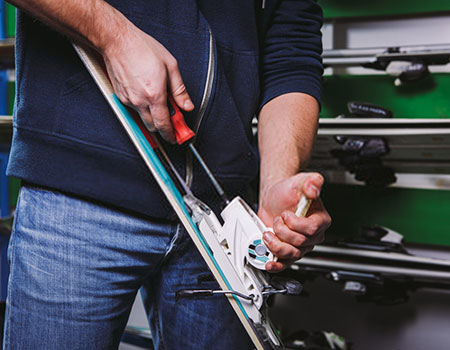
Therefore, if you prefer to start the adjustment process, you can do so by setting the feed pressure to your specific start. To do this you must have some tools, such as a screwdriver that should have a flat head. Once you have achieved it, then use it to get the flat metal tongue up. That tongue will be at the top of the heel piece.
When you have managed to lift this piece, that is, this tab using the screwdriver below, the heel piece will end up moving bi-directionally on the track. This will allow you from now on to have the possibility of adjusting the heel piece, concerning the sole of your boot.
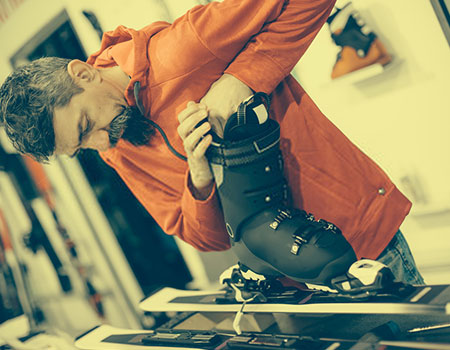
Depending on the type of boot you have, you can configure this part. If you have a small boot, you must move forward, and if you have a large boot, you must go back.
Step 1: Setting up the metal tab
Now to get this next step you must pay close attention since it is an important part of the process. First, if your boot clicks on the link, this alone does not mean that the configuration of these links is the most appropriate. As a general rule, the boot could click on the link independently.
Therefore, when the boot performs a click, then the metal tab should be between the external and internal hash marks. When we talk about the metal tab we are referring to that tab that you initially raised to move the binding.
Therefore, if this tab is in this place, that is, between these marks, and is also blocked, then the starting pressure will be adequate or correct. Now, if the metal tongue is located in the housing of the heel piece, or if it is hanging beyond the mark corresponding to the outer hash, we would be talking that the forward pressure is too much, or too low.
From this point, you must click on the union with the boot to discern the level of forward pressure. To do this, the metal tab should be located on the internal and external marks, but only at the moment when you do not click on the binding boot. This step must be done with considerable care as there are many incorrect positions for this case.
Step 2: Release configuration
Only when you have been able to get the pressure of advances in the links can you go to the next step. This next step consists of the necessary release configuration. The release adjustment widows will be able to show you the tension that is exerted on the joint spring.
This can be measured through a simple numerical system. Therefore, you should keep in mind that as the number becomes larger it means that the necessary pressure is increasing. This pressure is what is used so that the boot is adequately released from its fixings.
Then, the larger the number, the more likely your boots will remain on skis. On the contrary, while the number is getting smaller, the chances of their boots being ejected from their skis are increasing. Therefore it is important to get the right fit, to avoid especially an expulsion of the boots when you are using your skis.
You must take the previous screwdriver that you have obtained which, as you will remember, must be a flat head, with which you can download or upload the configuration in this case. Use the screwdriver to turn the spring screw clockwise or counterclockwise, depending on whether you intend to increase or decrease the pressure in the release configuration.
Step 3: Adjustments of the fixings with an STH heel piece
In this case, fixings that have this particular type of heel piece include Solomon STH 12, STH 16, STH 16 Steel.
To start setting the pressure forward in any of these fixings, you must do so with the metal adjustment screw. You will find this screw easily on the back of the heel piece. In this case, any screwdriver with a flat head will also be useful.
You must use this screwdriver to turn this metal screw in any direction. This means moving the screw clockwise or counterclockwise. This will allow the heel piece to continue moving backward or forward in the fixation guide.
What interests us is knowing how we can correctly establish forward pressure. To do this, click on the boot so that it is flush and parallel to the end of the black rail piece of the fasteners. Once you have achieved that the screw is located flush, you can see hash marks on the metal screw. If you manage to place the metal screw in this position, then you will have achieved a balanced forward pressure.
On the other hand, in the case that the screw was flush, together with the housing of the fasteners, then this means that the feed pressure has not been set correctly and properly. Therefore, there is no other way but to start over.
You must get click on the boot joint to determine the correct forward pressure. Therefore, we must repeat that you will notice the correct forward pressure when viewing the position of the metal screw.
Step 4: Release settings
To get a correct release configuration on these models, the process is similar to the previous brands. Again, take the screwdriver that you have previously used to insert it and place it with the spring screw.
You will find this screw on the back of the heel piece, as well as on the front of the toe. To properly adjust the tips and heels to the proper care, you must use the indicator release window. This window is listed to know the balanced adjustment in a better way.
Step 4: How to set ski bindings – STH Union
The next step is necessary to apply the adjustment of the toe wing corresponding to this particular piece. To achieve that you can detect a small screw in charge of the adjustment. This screw is located on the wing of the toe, and therefore will be embedded in the plastic.
To get this task done, you must take a flathead screwdriver, but it should probably be smaller than the previous one.
You may also like: Best Backcountry Ski Backpacks
Once you have a screwdriver, you can adjust. You should get the boot of the ski boot in soft contact with the wings of the fingers of the bindings.
If the wings are too tight against the ski or also fail to establish contact with the boot, this means that the fixation will not work properly and correctly.
Step 5: Ending the ski binding adjust
The last adjustment to be applied in the union of this type of piece refers to the height of the toe. This step is important since it is a factor that is directly related to how the ski boot is released. Therefore, it must be configured correctly to avoid any inconvenience.
For that, then start by detecting the adjustment screw, which will be found at the top of the toe. This screw manages to decrease or raise the height of the fingers. For this next step, you must have an AFD height adjustment tool, specifically one that is 0.5 mm thick.
This tool will help you slide it out of the boot with slight resistance. When you cannot remove the tool, it means that the adjustment applied is too much. On the contrary, the adjustment will be too loose if you can freely move this tool in and out.
Therefore, this means that the perfect fit will be when you can remove the AFD tool with slight resistance. This slight resistance assures you that the boots can be released from the fixings most appropriately.
You may also like: How to adjust Marker Ski Bindings
To finish this article we can mention that these secrets will be really useful for your skis to give you the best experiences. With just a few simple tweaks and settings, your skis will be ready for adventure.
That is why it is of great importance that you know how to adjust Salomon warden ski bindings. With this, you can get some good times, but above all you can ski safely, avoiding any inconvenience.