
his time we will explain the necessary steps to know How to adjust marker ski bindings. When using them during this activity you should keep in mind that a correct configuration will not only give you excellent moments but will avoid those that are bad.
Therefore, an improper configuration could cause some kind of shock, damage or injury during use. That is why we will now give you all the secrets you need to know to enjoy the best moments in skiing.
Therefore, after reading each of the following steps you will be closer to becoming a professional about this activity. By getting set up your skis, you will be saving money and time. Therefore, it is certainly convenient for you to continue reading the following key items.
How to Set Ski Bindings
In this article, you can easily and easily learn how to adjust ski bindings. Therefore, for this, you must pay adequate attention to be able to do a correct and efficient job. This can certainly guarantee the level of security you will need to get the best skiing experiences.
Therefore, to achieve this there are some key secrets that you must learn and with it, you can change your skis with what your friends have on the hill in a very short time.
Now, you should consider that there is a difference between providing an adjustment and having to ride again. Therefore, you will find the differences in a comeback. For that, you must remove the fixings, and position it again on the ski. It is a very simple process if you only get to understand and follow each of the following steps.
When we talk about fit, we are referring to the proper fit that is applied to the heel piece. This piece is usually found on flat-mounted skis, or it can also be on the toe and the heel does entail a ski system. This system is usually understood as an integrated fixing system.
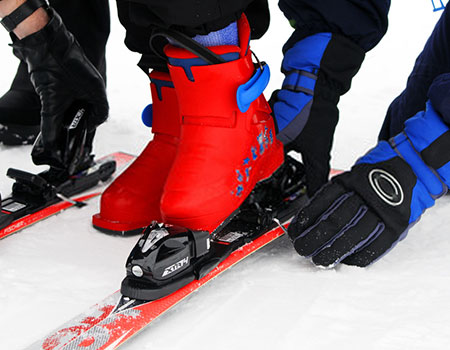
Step 1, check the components of your skis
Therefore we will explain each of the necessary steps below so that you can adjust the pressure forward if we consider flat-mounted skis, which include Marker Bindings. Of course, the corresponding links must be adjusted so that at its start it clicks.
However, for the link to function properly and provide the forward pressure, it must also be properly and balanced. Once you have correctly checked each of the components with which we are going to work on the skis we can proceed to the next step.
Step 2, detecting the forward pressure
This step is very useful for those skis that are Comp 16, Jester Pro, Jester, Griffon, Squire, among others. In these cases, the indicator, which you can see when applying the forward pressure on the back of the models of these brands, is a silver screw that you can find on the back of that black housing. You can find this case as part of the heel piece.
To find out if the configuration is correct for forwarding pressure, you should then check if this screw is flush with the mentioned binding case. If this is so, while you click on the trunk then you have managed to obtain the appropriate configuration. You can also use a marker binding adjustment chart to help you.
On the other hand, if this same screw is not too tight or even too loose, you may realize that the heel piece is too far behind. A very easy way to detect this is to visualize the screw protrudes a little. If so, then simply the forward pressure is very low, which of course is also dangerous.
You must take into account that any object that you use for skiing, how is this case and is loose, could be disassembled in the middle of its use. As you can intuit, this is not highly recommended.
Step 3, adjusting the pressure forward
Therefore, now it’s time to know how to perform the marker binding adjustment. Then, for this step, you should take a Phillips screwdriver, which will allow you to get the most appropriate setting and adjustment of the feed pressure. If you do not have a screwdriver of this brand, then any other that has a flat head will serve you.
Once you have got your screwdriver then you must work on the mentioned screw until it is flush with the black housing. To do this, simply turn the screw with its screwdriver clockwise until it is tight.
By doing this, you can eject the ski boot, of course, from the fixation. Once this is done, you must click again and repeat the screw check. This means checking whether the screw mentioned is flush with the black housing or not. At the same time, you should check that this screw is not too tight since the pressure will be too high and is not recommended.
Step 4, Getting the right balance of the pressure forward
If you have verified that the screw is too inside the mentioned black housing, then as we mentioned the forward pressure is too high. Without a doubt, you should take your screwdriver to turn the screw counterclockwise. This way, you can lower the forward pressure a bit. Therefore, now you can verify if the pressure exerted is adequate.
To achieve this you just have to have removed the boot and then place it once more. Thus, when performing this step and verifying that the silver screw is flush with the black housing, then it means that the pressure balance is adequate and proportionate.
Now, it is necessary to clarify that if for some reason you do not get the proper and correct adjustment of the screw, that is to say, the forward pressure, or even if it seems that the same ski bindings should be reassembled, then the most advisable will take the product and take it to the nearest local store.
In this way, you are sure that the configuration is correct, and of course, why not, learn from a professional. Remember once again that performing this process can be a bit complicated. At the same time, it must be done most appropriately and correctly since it is your safety.
Now, in the case that you have achieved the correct and adequate configuration for your links, this is correctly adjusting the feed pressure, then we can move on to the next stage.
Step 5, configure the DIN
First, the Marker Griffon heel piece has a window where you can detect the visual indicator. This indicator is responsible for showing you what the configuration of the DIN moment is. But how could you tell which is the correct fixation? First, you can take the same screwdriver previously used to lower or raise the DIN grip. By doing this, you will be properly configuring this part of the skis.
We can recommend a series of key items to detect the correct configuration of your DIN. But in case you don’t easily find the answer, then it would be highly recommended that you go to the nearest local store. Remember that we are talking about your safety when using this product.
Now it comes when you have already been able to know what your DIN level should be for a particular link, then you will know in a better way how to set up skis in the next time.
Step 6, adjusting the anti-friction device
When you have been able to adjust the DIN and the forward pressure, then you will be able to get the proper adjustment of the anti-friction device (AFD). This part of the skis is a piece that includes a spring in the fixation, which should be located just below the tip of the trunk. This will undoubtedly free you cleanly during a crash. If you have achieved this step, it means that the ski binding adjust can be set correctly.
If you start your boot for the first time, then surely everything can be fine. On the other hand, this does not usually happen in all cases. This is because the pressure might be too high and eventually forces the boot into the binding case. Although also, the opposite could happen if there is a lot of space between the binding and the boot.
You may also like: Best budget ski gloves
Detecting this is essential because you will be preventing it from being released if a crash or accident happens when you are using them. A pressure that is too low may allow your boot to come off unexpectedly, and on the contrary, the pressure that is too high will allow the release to be much more complicated.
Just place the boot in the correct joint, and check the available space between the bottom of the boot and the AFD. If you get an intermediate space that is not too much, nor too insufficient then you will have the correct configuration.
At the moment when the anti-friction device turns out to be very low then I took an Allen key to turn the adjusting screw counterclockwise. In this way, you will increase the height. However, you should do it little by little each time so as not to go beyond the proper balance.
Therefore, you should get the boot to touch just the bottom, producing only a little resistance. To verify this, you must take a business card and insert it between these two parts, that is, in the space that should have little resistance.
If you cannot insert the card with low resistance, you must take your Allen key to turn the screw in the opposite direction. You can repeat this process of turning the screw clockwise and counterclockwise to achieve the perfect balance.
To achieve the appropriate configuration you can use any business card and insert it in the lower part of the mouth. If the anti-friction device touches lightly and produces some resistance, then it will have achieved the perfect balance.
Conclusion
Remember also that these steps will be really useful for your current skis, as well as in case you want to get new ones. This means that in case you want to buy a new product, then you will already have the right knowledge to grant them the correct configuration from the beginning.
You can also check the other articles in this blog that will be very useful to learn new data and techniques for your skis.
These steps will be really useful to learn how to adjust marker ski bindings. This means that you can get the best skiing experiences from now on. I enjoyed their skis as never before.
From now on, you just have to take your correctly configured skis and go on an adventure.